Monday, September 26, 2011

Blog ain't dead (and stuff about furniture)

On the contrary, there are ideas that have yet to be realized, and topics that have barely been touched. I've lost considerable steam here, yes. This can possibly be attributed to several things: One, I've been reading a ton-load of books. Two, I am trying to acquire pictures of things that I both promised to blog about and I very much want to post on. Three, my obsessive nature leads me to do one thing very intensively, and then forget about it for a time while I obsess about something else. Four, I realized that I actually have other things I've been neglecting to do, mostly stuff around the house. I mean,  not just some things, more like a list of about 30 things I've been neglecting. Lucky for you, I've got some useless banter to fill the void today, including a trip we made to Ikea yesterday. We brought home some beautiful white furniture for our bedroom that looks something like this:


I really love this style of bed frame. It's simple and classic; I doubt that this is going to look tacky and outdated ten years from now. It almost looks vintage, and I liked vintage before it was cool to like vintage (Uh oh, I sound like a hipster!) I found this image on a google image search and would attribute the source if it was known to me:


Isn't it gorgeous? I love it. Unfortunately, I married a man who loves sleek and modern decor (which utterly clashes with my love of classic) so we had quite a time trying to compromise on decorating the house. We both liked the Ikea Hemnes series. It looked simple and vaguely "country" style to me, but sleek enough to satisfy Jorge's tastes. Either that or I'm just rubbing off on him. Anyway, our dressers look like this:


So, white bedroom furniture. I like the look of wood furniture, but the floors of our bedroom are some kind of wood laminate that looks somewhat like this:


I thought that the wood finishes we liked best would clash with this color floor, so we went with white. It's not only a pretty color, but it's safe and it matches with things. Now we are asking ourselves what we are going to do about the paint job. The previous owners didn't do a very good job, but they left the can of paint at the house. I like the color, but am not sure that it would work with everything else we've got going on. I mean, it looks good (and would look better as a contrast against the white) but I spent years of my life making this quilt and want it to look really nice with the quilt as the focal point of the room, without compromising the beautiful contrast of the headboard against the wall. Our walls are currently this color:

It feels a little darker than it looks in the picture. I know that it would contrast against the headboard on the bed, and made that stand out... but I feel like maybe going a little lighter or maybe in the neutral range. Here's what the quilt I'm talking about looks like: 


So, what do you think? Leave it like that? Maybe go a little lighter and match the green on the quilt? Go neutral? Darker? Blue? Purple? All I know is from reading blogs like Design*Sponge. I don't claim to be good at this, but I'm pretty sure I know what I like (more or less). Now that I'm shifting gears back into house decorating, I think I'm going to follow up with the things we have already did back in April and May.


Wednesday, September 21, 2011

Apple Pie Cupcakes (with caramel whipped topping)

All, right! So, I've had this thing not quite ready to post for ages now. I actually have quite a few things to blog about, but am reading my 9th book in <2 weeks. Right now, I'm on the 4th book of the Harry Potter series, and people were quite right in saying that I would enjoy them. I think I'm going to try and see how many books I can finish before the end of October, because I got my kindle for my birthday last year and have been keeping track of how many books I've read since I got it (a disappointing 21 so far- I want to make it to 30!)

Back to the cupcakes. I made them for my husband's birthday in May, and have been needing to blog it for a while because it's one of the best desserts I've made. I threw this together before the ice cream cupcakes, and had to hide them in the fridge for a surprise party! I based the filling from this blog and the frosting from here.
What you'll need:

For the cake:
1 box cake mix plus egg, water, butter (whatever it says on the box).
Or cake batter from scratch recipe of choice
Bake them in cupcake papers and let them cool.

For the filling:
3 cups of cored, peeled, and diced granny smith apple
2tbsp butter
3tbsp sugar
2 tsp cinnamon
1 tsp nutmeg

Heat butter, cinnamon, and sugar on med-high for a minute. The mixture should bubble a little. Throw in the diced apples and turn it to medium. Cover the apples in the cinnamon sugar mixture and heat until soft (about 10 mins). Let it cool before adding to your cupcakes! 

For the topping:
2 cups heavy whipping cream
6 tbsp granulated white sugar
1/2 tsp water
1 tsp vanilla
Okay, this is a bit trickier than the first two steps. Making caramel is pretty simple, but if you goof it gets too sticky. You can, however, salvage a mess and use it for this recipe as I did. My mistake? I didn't stir the sugar enough! I read from this link

"Prepare the caramel sauce. Combine the sugar and water in a heavy saucepan and stir well to mix. Put the cream in a second small saucepan (or put in the microwave proved measuring cup). Place the first pan on medium heat and cook undisturbed until the sugar begins to melt and caramelize-you’ll see a few wisps of smoke coming out of the sugar. Reduce the heat to low and stir occasionally so that the sugar melts and caramelizes evenly. Remove it from the heat when the caramel is still very pale (the sugar will continue to darken off the heat). Slide the pan with the cream onto the burner. As soon as the cream has some bubbles around the edge (if using microwave put the cup in the microwave and heat for 1 minutes), add it to the caramel at arm’s length, averting your face-the caramel will boil up and may splatter out of the pan. Pour the diluted caramel into a medium bowl and cool it to room temperature."

It says "cook [the sugar] undisturbed until the sugar begins to melt and caramelize". If you haven't done this before, let me warn you to be vigilant! I left it too long before lowering the heat and stirring. If you're not sure if the sugar is caramelizing yet, toss it around in the pan to check for signs. Again, don't let this keep you from trying this combination of apples and caramel whipped cream- you will NOT regret it even if you mess up!


I baked the cake and hollowed out the cone shapes like I did with the ice cream cupcakes. Then I added the apple filling and put the lids on. 


Set them aside while you work on the topping.


Looks like caramel, right? Well, mistake #2- I wanted dark caramel. It was super sticky! I lost a lot of it, but the good news is, it washes out really easily with hot water.


Mixing the caramel with the rest of the cream- this is when it really started to come together. I thought there was no way the cream would whip up stiff peaks with all that sticky caramel, but it didn't let me down! The result was worth the effort.


Mmm, look at the surprise inside! My husband loved these for this 30th birthday.


Sunday, September 18, 2011

Books: Bigger on the inside

After catching up with Doctor Who, my husband and I decided that we, too, are huge nerd fans for the show. I admit that during the first few episodes I was getting used to the campyness of some of these villains... only to find even campier ones to come. I think the climactic moment of campiness was when the Daleks and the Cybermen headed toward each other in a hostile manner crying, "EXTERMINATE! EXTERMINATE!" and "DELETE! DELETE!" respectively. Perpetually seeking ways to incorporate my geek passion with my crafty passions and live up to the title of this blog, I leapt at the opportunity to knit a Tardis. Yes. Ravelry is a treasure trove of patterns that one would not have imagined possible... So, without further ado, view this nifty kindle cozy that fits the kindle inside the leather cover from amazon. When you think of it, the Tardis is not the only thing bigger on the inside!


Wednesday, September 14, 2011

Curry Lentil Soup

In case you're wondering, I don't exlusively cook horribly fattening albeit fatally delicious meals. They are just so much more fun to take pictures of and blog about than healthy things like salad and whatnot.I've made this a half-dozen times now, and this makes a great comforting soup that actually has a great flavor and is a satisfying meal. I added chicken base and bacon fat, but if you use substitutes, this can be made entirely vegetarian.
4 small red potatoes or 1 lb russet, diced into small 1/2 cubes
2 large stalks celery, diced
2 carrots, diced
1 medium onion, diced
1 lb diced tomato
2 cups frozen chopped spinach
6 cloves garlic, crushed
1 tbsp bacon fat or oil
8 cups water
1 tbsp chicken base
1 1/2 tbsp curry powder
1 tbsp badia complete seasoning
salt & pepper to taste
1 lb of lentils (about 2 cups)
Tip from me: Celery leaves are great in soup. No need to discard that good stuff! When I use celery stems in things like tuna salad, I save the leaves for soup. Likewise, when using herbs like cilantro or parsley, don't just use the leaves, throw in the stems, too. Use everything you can, just wash it first. I put cilantro in the food processor. The stems have a lot of flavor!


Add the bacon fat or oil and the chopped carrot, celery, onion, potato, and garlic. Mix it up and leave it to cook covered on medium heat while you rinse your lentils.

Add all remaning ingredients (make sure you have a big pot!) and bring to a boil.


When it comes to a boil, turn it down to med-low heat and leave to simmer until the lentils and potato chunks are soft (about 30 mins).


The soup is going to be chunky, so you can add more broth and less veggies if you like it more soupy.


It got the seal of approval from Jorge, who said that he could smell it before he came in the house. It came out great, and I'd make it again! It's pretty healthy except for the oil/fat I added at the beginning. If you want to omit that part, you can add all your ingredients together at once and boil them. You can also add less water and serve as a stew over rice. Cilantro would also make a great garnish for this soup.

Monday, September 12, 2011

Amigurumi Cupcake

It's really hard to stop once you start. Knitting, that is. It's addictive. When you see the things you can make with two needles and some yarn, it feels like some sort of magic. When you see what you can make with five needles at once, the possibilities are endless! You can make 3-dimensional objects with a bunch of wooden stitcks and some string!


This cupcake was the first thing I ever knit with DPNs (Double Pointed Needles). I finished it before I finished my mermaid, and between the acquisition of Knitting Mochimochi and Teeny-Tiny Mochimochi. You can guess what that means. I will be making so many things now. Bwahahahaha.... (does it sound like an evil laugh when I'm talking about such adorable things?)

Here's what it looked like coming together. I always think I should take more pics but never do. Huh.


This is the same yarn I used for the flesh tone of Mermaid # 2. I added extra height to the base, deviating slightly from the pattern.


I added cardboard to the bottom and picot edges.


I cross-referenced many different patterns and ended up using some tips from other Ravelry users here and there, like the decreases at the top and the picot edges. One of the many great things about Ravelry.


There you go. What will I make next, hmmmmmm?

Saturday, September 10, 2011

Shortcut Stroganoff

Let me start by warning you that this is not a healthy meal. Most of the meals I post about are not because they're healthy, it's because they have a good flavor. I've made stroganoff the "right" way before, everything from using steak to making the roux. I cheated when I made it this time and it came out just as tasty.

16 small pre-cooked meatballs, halved & sliced (about 4 meatballs per serving- generous!)
1/2 large onion halved lengthwise & sliced
4-5 baby portabello mushrooms, halved & sliced
4 large cloves garlic
2 tbsp flour
1.25 cup water
1/4 cup white wine
2 tsp beef base
1 tsp badia complete seasoning
1 spoonful sour cream garnish
1 lb pasta

I bought this seemingly bottom-less bag of meatballs at Costco. They are the best frozen meatballs I've ever had, so this enormous bag comes in handy for all the recipes that I can use meatballs for! They've got a good flavor and feel nice and meaty.


First I thawed my frozen meatballs and chopped the onion and mushrooms.


I threw them in the saucepan and added the garlic on top, then mixed it up and cooked it covered over medium heat until the onions and mushrooms became soft. I then added the 2 tbsp flour and mixed it into the juices and cooked for a couple mins.


I added 1 1/4 cups water, 1/4 cup wine, and 2 tsp beef base and the badia and let it simmer on med-low while I prepared the pasta. This is enough sauce for at least 4 people and 1 lb of pasta.


In the original version of the recipe, you add the sour cream to the sauce just before serving (it doesn't heat well).  I made enough for leftovers, so my solution is to add it to the bowl instead of to the sauce!


I served the pasta, then spooned some sauce on top...


Then mixed in a spoonful of sour cream, and it was fresh and tasty.


Jorge told me that he wished I would let him be a glutton. I take that as a compliment. Anyway, this was pretty easy, and I'd definitely make it this way again.

Wednesday, September 7, 2011

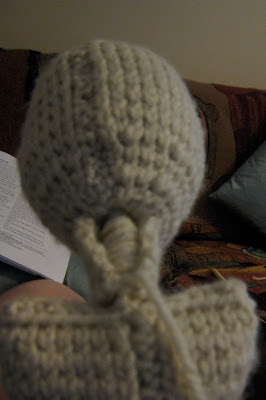
My first finished Amigurumi Mermaid

So, the Mermaid (1 of 2) I posted about before is finished! All she needs is a name and maybe some jewelry.


It was a bit of a pain to put together, and the pattern was confusing in a couple parts, but that's probably because of my lack of experience more than anything else. She looks pretty cute. I thought I might not be keeping her, so I started to make another because I wanted one of my own. That one is almost finished except for her ears and one hand. I was a little frustrated with this yarn (Caron One Pound) at first, but it's not as bad as I expected. The Vanna's choice I used for the skin tone of Mermaid #2 is infuriatingly splitty, though. She looks worse just for the splitting! More on that eventually. For now, here are the photos of my first amigurumi project!


After seaming her together and stuffing her, I had to make a yarn and straw contraption to assist in holding her head up. Lots of glue was involved.


This is the little hole where the other end of the straw goes.


Then I had to sew on her neck to cover the ugly straw. Also, the seaming wasn't done in a proper "mattress stitch" which hides the seams better. Will try that next time...


At this point I was thinking that she wasn't too pretty, and too pasty for a mermaid, but she had a nice shapely fin going on.


Attaching her hair: I added a bit more than the directions required, and I made her hair about 8 inches longer than it said (because she was bigger overall). I then unraveled each strand of the vanilla-scented yarn to make her hair look more like hair, and less like a rag doll's yarn hair. It gave a crimped look, which reminds me of the character Madison from "Splash".


She turned out pretty cute after adding her shells, hair, and face. She looks more lively now (and less pasty).


I totally didn't follow the directions for making her face. I mean, I used them as guidelines, but her eyes were tiny in the pattern. Much better now. She's got a doll face but is cool enough for grown ups to want one (me).


After unraveling about 150 strands of yarn, I had to sew on her long, beautiful, 80's style hair. How do mermaids crimp their hair? Do they use tiny clams?


I crochet chains directly into her shells to make it look like bikini ties.

So, there she sits decorating our library. I'm going to make more sea creatures eventually, like an Octopus and Nessie!

Monday, September 5, 2011

Still Alive..ish

So, the idea of gardening lost a little steam after my tomato plants started to die. I don't think it was the heat per se that did it. Maybe it was the rain. Actually, it's probably a combination of the two. I planted some stuff too early. It wasn't like I even used store bought seed, I just planted seed from produce we used. At any rate, the tomatoes are hanging on for dear life:


 They seem to be suffering from Southern Blight and whiteflies.


My peppers have been infected too, and are also being chewed away by an unknown pest. The one above is the healthiest looking of the bunch. I've caught snails on them before, but am not sure that snails have been able to reach the peppers at this point.
My herbs are doing pretty well for now.


The top three are the Oregano plants that have survived.


Above is my Parsley plant.


I haven't done anything to the bananas and just look at them!
I went to Fairchild Tropical Botanic Garden last weekend and brought home two more succulents to add to my collection:


The succulents have been troopers. They survive so much neglect. I'll try not to give up on the whole gardening thing altogether, but I may just scale back to a small handful of plants that I'll plant in October.