Showing posts with label cooking. Show all posts

Saturday, March 17, 2018

Instant Pot Cuban Style: Lechon, Moros, y Yuca

Juicy meat (not broiled), rice and beans, and yuca bursting with garlic and citrus flavor.


A couple months ago my father in law brought over a massive pork shoulder that he had been given. Despite being Cuban, they had never cooked one before and left that to me to figure out. It was a 10 lb hunk of meat, bone and all, and seemed a little intimidating. One day I took it out to thaw and figured it couldn't be avoided forever.

I had done a little research trying to figure out what cut of meat it was, and what it was supposed to be used for. I read that a pork shoulder is best cooked over a long period of time on low heat, but it wouldn't even fit in my slow cooker. But then a light bulb went off as I came across this site. I have an Instant Pot!

First of all, that source is not really authentic, but it does pretty much follow the same guidelines as most recipes I looked at. Except, you really don't need any additional fat at all whatsoever, because pork shoulder is very fatty. More on that later.

I am not going to go into the history of each dish or how they got their names. I'm going to provide links to sites I used for instructions and describe what I did and what worked for me.


Lechon Asado: Cuban Roast Pork

I marinaded my 10 lb pork shoulder overnight in:

-1 cup sour orange juice (mine was 1/2 regular orange juice and 1/2 lime juice, because we had it on hand)
-1 head of garlic
-2 tsp salt
-1 tsp pepper
-1 heaping tsp oregano

The Three Guys From Miami recipe says to add 20 cloves of garlic, which makes me think it would have been more to my liking, but it was still very tasty. 

The following day, when I was ready to cook the pork, I placed it in my 8 quart Instant Pot and set it to:

-Manual, High pressure, 150 mins (2.5 hours), natural release

Based on the Instant Pot instructions I found earlier. She suggested 120 mins for an 8 lb roast, so I added another half hour for the 10 lb roast. Otherwise it would have taken 8-10 hours on the slow cook setting. In retrospect, while the outer layers were falling off the bone, the inner parts could have used more time. 

Most of the fat removed, in the process of removing the meat from the bone.


So, I generally don't like working with meat on the bone, or with fat- but it adds flavor. It was a mess but worth the hassle. When it was done depressurizing, I put the roast on a cutting board and removed chunks of fat while I took the meat off the bone. 

Pulled off the bone out of the Instant Pot.


Afterwards, I skimmed as much liquid fat as I could out of the remaining liquid in the pot and then put the shredded meat with the liquid into my 4 quart crock pot (which it filled to the very top!) I left it to simmer while I used the Instant pot for the next part of dinner: rice and beans. Before we move onto that, I have to add that while we ate the soft, shredded pork straight from the crock pot that first night, I reheated the leftovers by broiling the meat for about 15 mins on high, flipping it mid way through. I liked it much better this way. The only things I think were missing from the pork were onions (both recipes contained them but I failed to add it) and fresh squeezed lime on top. 

Moros y Cristianos: Black Beans and Rice

I have never made this before, either- it's a version of black beans and rice that uses the black water from the beans to cook the rice, giving it a dark color. I have made black beans many times before and I have to say I need to perfect this method because it was a little bland for my tastes. I followed this recipe, even though it says "Congri" which I believed to be red beans and rice- but there is a bit of controversy and confusion over the name "Moros" but I'm just sticking to what I know here.

I put the following in the Instant Pot, and turned it to the "Beans/chili" setting. 
-1 lb of dry black beans
-6 cups of water
-1 Tbsp of bacon fat

I let it do its thing and depressurized after 10 mins of natural release. Next, I drained the beans in a colander over a bowl to save the liquid. Then, on the saute setting, I cooked just until softened:
-1 large onion
-4-5 cloves garlic
-1 large green bell pepper

Then added the remaining ingredients, mixing them together and cooked it on the Rice setting, again releasing pressure after about 10 mins after the cooking was completed. There was just enough liquid to cook the rice and everything turned out well.
-1/2 tsp cumin
-1/2 tsp oregano
- 1/4 tsp of bay leaf powder
-2-3 cups of long grain rice (I used 3) + equal amount of liquid reserved from beans
-drained beans

I feel it lacked something, then I remembered I failed to add salt and pepper. I've also seen recipes add vinegar, tomato paste, or red bell peppers, too. I usually add Sazon Goya to my black beans, I think I'll try that next time.

Yuca con Ajo

Finally, I made some Yuca (from frozen bought) and made it exactly as this recipe suggested from the Three Cuban Guys site, which is NOT done in an Instant pot. It's the easiest recipe out of all of these, though. It is boiling yuca for about 30 minutes and cooking garlic and onion in olive oil (with salt and lemon, of course). It was so delicious. For some reason, this always comes out a thousand times better than any yuca I've ever had in a restaurant. Maybe because I love the strong flavors of garlic, salt, and citrus together. It's pretty perfect. The only things I changed were that I crushed the garlic in a press and mashed it with the salt in a bowl, and that I like cutting the onion in slices so that there are rings of it when it's cooked, instead of dicing it up. The same thing goes for the pork.

There you have it. It's a lot of work (initially) but it's doable when you don't have a Cuban restaurant handy nearby, and if you're like me you can make a HUGEMONGOUS amount of food and feast all week long. Or invite your friends and family, like we did that first night. Or freeze some for later.  

Lechon reheated under the broiler in the oven- slightly crispy.

Not pictured: about the fourth meal into this pork, we bought some frozen maduros (sweet plantains) from the supermarket and baked them in the oven. It caramelized them and made them slightly crisp on the outside. Yum!


Wednesday, September 14, 2011

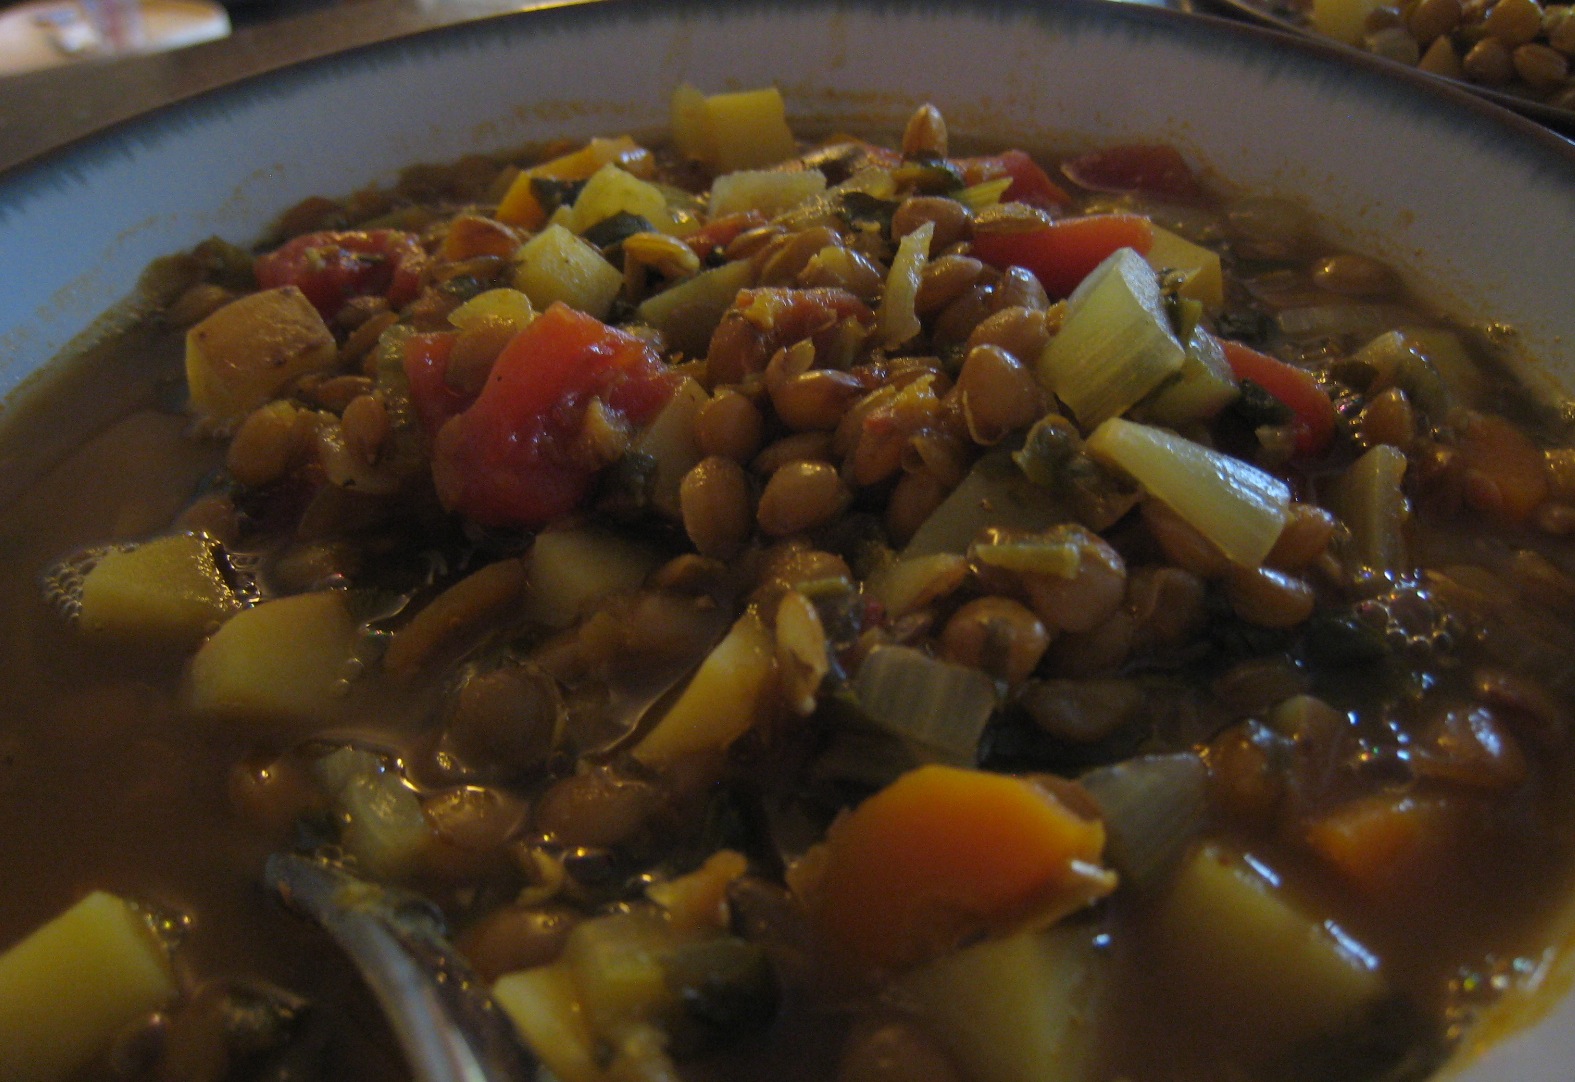
Curry Lentil Soup

In case you're wondering, I don't exlusively cook horribly fattening albeit fatally delicious meals. They are just so much more fun to take pictures of and blog about than healthy things like salad and whatnot.I've made this a half-dozen times now, and this makes a great comforting soup that actually has a great flavor and is a satisfying meal. I added chicken base and bacon fat, but if you use substitutes, this can be made entirely vegetarian.
4 small red potatoes or 1 lb russet, diced into small 1/2 cubes
2 large stalks celery, diced
2 carrots, diced
1 medium onion, diced
1 lb diced tomato
2 cups frozen chopped spinach
6 cloves garlic, crushed
1 tbsp bacon fat or oil
8 cups water
1 tbsp chicken base
1 1/2 tbsp curry powder
1 tbsp badia complete seasoning
salt & pepper to taste
1 lb of lentils (about 2 cups)
Tip from me: Celery leaves are great in soup. No need to discard that good stuff! When I use celery stems in things like tuna salad, I save the leaves for soup. Likewise, when using herbs like cilantro or parsley, don't just use the leaves, throw in the stems, too. Use everything you can, just wash it first. I put cilantro in the food processor. The stems have a lot of flavor!


Add the bacon fat or oil and the chopped carrot, celery, onion, potato, and garlic. Mix it up and leave it to cook covered on medium heat while you rinse your lentils.

Add all remaning ingredients (make sure you have a big pot!) and bring to a boil.


When it comes to a boil, turn it down to med-low heat and leave to simmer until the lentils and potato chunks are soft (about 30 mins).


The soup is going to be chunky, so you can add more broth and less veggies if you like it more soupy.


It got the seal of approval from Jorge, who said that he could smell it before he came in the house. It came out great, and I'd make it again! It's pretty healthy except for the oil/fat I added at the beginning. If you want to omit that part, you can add all your ingredients together at once and boil them. You can also add less water and serve as a stew over rice. Cilantro would also make a great garnish for this soup.

Saturday, September 10, 2011

Shortcut Stroganoff

Let me start by warning you that this is not a healthy meal. Most of the meals I post about are not because they're healthy, it's because they have a good flavor. I've made stroganoff the "right" way before, everything from using steak to making the roux. I cheated when I made it this time and it came out just as tasty.

16 small pre-cooked meatballs, halved & sliced (about 4 meatballs per serving- generous!)
1/2 large onion halved lengthwise & sliced
4-5 baby portabello mushrooms, halved & sliced
4 large cloves garlic
2 tbsp flour
1.25 cup water
1/4 cup white wine
2 tsp beef base
1 tsp badia complete seasoning
1 spoonful sour cream garnish
1 lb pasta

I bought this seemingly bottom-less bag of meatballs at Costco. They are the best frozen meatballs I've ever had, so this enormous bag comes in handy for all the recipes that I can use meatballs for! They've got a good flavor and feel nice and meaty.


First I thawed my frozen meatballs and chopped the onion and mushrooms.


I threw them in the saucepan and added the garlic on top, then mixed it up and cooked it covered over medium heat until the onions and mushrooms became soft. I then added the 2 tbsp flour and mixed it into the juices and cooked for a couple mins.


I added 1 1/4 cups water, 1/4 cup wine, and 2 tsp beef base and the badia and let it simmer on med-low while I prepared the pasta. This is enough sauce for at least 4 people and 1 lb of pasta.


In the original version of the recipe, you add the sour cream to the sauce just before serving (it doesn't heat well).  I made enough for leftovers, so my solution is to add it to the bowl instead of to the sauce!


I served the pasta, then spooned some sauce on top...


Then mixed in a spoonful of sour cream, and it was fresh and tasty.


Jorge told me that he wished I would let him be a glutton. I take that as a compliment. Anyway, this was pretty easy, and I'd definitely make it this way again.

Thursday, September 1, 2011

Thai Chicken

On a lark, I decided to make Thai Chicken. Keep in mind that this is American Thai food. It's an exotic twist on familiar ingredients, just enough to push sissies out of their comfort zone (soy sauce? peanut butter? I know what those are but why are they together?!) I love how it turned out, and would certainly make it again in a heartbeat, especially with all the ginger I have leftover. I had leftover cilantro from the guacamole I made, and I was in a hurry to use it before it wilted. I'm really glad I added the cilantro, it goes wonderfully in this dish! This is what I came up with after mixing & matching recipes and ad-libbing. I never learn, do I? Well, good thing, because it turned out amazing. I'm making a note here: huge success. These pictures are from the first time I made them, but I included bonus veggies in the recipe from the second attempt.
Here's what goes in :

2 chicken breasts, halved (opened like a butterfly), then thinly sliced into strips width-wise
3-4 cloves garlic, crushed
3 tbsp oil
1 1/2 tbsp fresh ginger, minced/grated
1/2 onion, chopped (it was supposed to be green, but I used what I have!)
sliced green and red bell pepper (about 1/4 pepper each)
2 cups of diced broccoli (I used frozen)
1 rib of celery, sliced
1 carrot, peeled & sliced
1/4 cup fresh chopped cilantro
1/4 cup chopped peanuts

Sauce:
7 tbsp soy sauce
5 tsp white wine vinegar
2 tsp Worcestershire
4 tbsp creamy PB
2 tsp curry powder
1/2 tsp cayenne
2 tbsp brown sugar


In a small bowl, mix the soy sauce, worceserchire, vinegar, peanut butter, curry, cayenne, and brown sugar. Add more or less of any ingredient to suit your tastes.


Mix until creamy (I found it hard to eliminate clumps of PB at first, but the texture improves as it sits... maybe the vinegar breaks it down?)


Cook your chicken, garlic, and ginger in a skillet or wok over med-high in the oil until the chicken is browned on the outside. Note: The chicken browns best in a dry pan.  That is, add the minimum oil and omit juices, otherwise it will look white like mine. Your choice!


Throw in your array of veggies as well as the peanuts. Cook for about 10 mins, until the chicken is cooked through and the veggies are nice and soft.


Throw in the sauce you made (it should be the right texture now, give it a good mixing if needed) and mix everything up. Let it sit for one minute.


Add the cilantro and turn off the heat.


Serve over rice or rice noodles and enjoy! It's going to taste great! This should be enough for about 6, depending on how ravenous your family is. I tried feeding it to my brothers and this would have been about enough for two teenagers. Note: If you have teenagers, make triple and just throw it all in a trough. If not, just serve over a bowl of rice or noodles and they will get coated in that yummy sauce!


Saturday, August 27, 2011

Fresh veggie egg skillet

Remember the cilantro I used in my Guacamole? I had to think of what I could make with the leftovers, and I came up with this dish that wafts up the aroma of fresh veggies while it cooks. This is my favorite way to make eggs. I love cooking with fresh veggies! Here's what I used, but you can ad-lib as you please. This is very veggie-heavy.

Fresh veggie egg skillet
2 small baby portabello mushrooms, chopped or sliced
1/2 large tomato (or 1 small), diced
1/4 cup diced red & green bell pepper
1/4 cup diced onion
2 small cloves garlic
1 tsp bacon fat, oil, or butter (butter or bacon fat taste the best)
4 eggs
cilantro, a couple of sprigs washed & chopped
salt & pepper, to taste
1/4 tsp badia complete seasoning
1/2 cup shredded cheddar


One of the great things about making eggs is that you can throw in just about anything you want in any quantity you have on hand. Don't scrutinize quantities, it turns out great regardless!


Cook mushrooms, onions, bell pepper and garlic in bacon fat, covered over medium heat until veggies turn soft.


Throw in the tomatoes to heat for a couple minutes while you beat your eggs in a small mixing bowl.


Add the eggs by pouring slowly right into the center of the pan. Turn heat down slightly to just under medium. Now you're going to want to sprinkle on your salt, pepper, and other seasonings if desired.


Wait a few minutes for the bottom layer to cook, then scrape the egg off the bottom and sides of pan, allowing the liquid to take its place and cook.


Repeat until all your eggs are cooked.


When your eggs are all cooked, now you want to add the cilantro and mix it up (alternatively, use as a garnish).


Sprinkle the cheese on top and cover. Turn heat to low for one minute to allow the cheese to melt (it should be quick).


It should look like this when you're done. This should be enough for 4 people for breakfast, accompanied by toast if you like. We split it as a big brunch meal. It's best fresh, and we sure didn't let it go to waste!

Friday, August 5, 2011

Chili

I know this is really not your classic summer meal, but I grew up with this staple during all seasons. I tried to replicate what my mom would make, so I asked her more or less what she puts in it and tried making my own. Again, I started with what I learned from my biggest teacher. I don't follow a recipe at all, but it turns out great. The beauty of soups/stews is that you can add more or less of any ingredient to your liking and it will still turn out great. I've made other soups, too but this one will always be a favorite. This is how I made it:


5 oz Red Kidney Beans + 3 cups of water in a big stockpot
1lb ground beef
1 large stalk of celery (or two small)
1 large carrot
1 medium onion, diced
4-6 cloves of garlic
1/2 tbsp chili powder
1/2 tbsp taco seasoning

2 tsp cumin
2 tsp badia complete seasoning
1/2 tsp paprika

1/4 tsp chili flakes
1/8 tsp cayenne pepper
1 cup of corn
28 oz diced tomato
1 beef bouillon cube (or 1 cup beef stock for more liquid)
1 small bunch of cilantro, chopped in the food processor.


1) Bring beans & 3 cups of water to a boil in a large stockpot, then turn to med-low for 1 hours (until soft). take off the burner and set aside.
2) While the beans are cooking, chop your onion, and cut the celery & carrot into chunks. Throw into food processor.
2) Brown ground beef in a deep saucepan. Drain fat if needed. Add onion, celery, and carrot, then crush the garlic into the pan. Keep covered on medium heat until onions turn translucent.
3) Add spices and mix well. Take the beef off the heat and put the beans back on.
4) Add corn and tomatoes to beans in stockpot, then add beef mixture. Mix well and heat on med-low for another 20 mins.
5) Add cilantro, mix and serve.
Note: this will produce a thick chili. For more soup-like chili, add 1.5 cups of water mixed with a tbsp of tomato paste. Servings this yields? I haven't counted that yet, but it seems like 6-8 depending on how much you serve...

This is one of those recipes that improves with time. I'd like to try this out in a slow cooker from this point; I think the slow simmer does wonders for the flavors. I make double this recipe and freeze it. I doubled this recipe in the pictures you see here. You can serve it over rice, by itself, or on mac n' cheese. We like to put raw onions, sour cream, and cheddar on top!

I do not pre-soak my beans. I've done the "quick method" for soaking dry beans, and the way I mentioned here works much better. If the beans are not done by the hour mark, just leave them on a separate burner while you start to brown the beef.


Bring beans & 3 cups of water to a boil in a large stockpot, then turn to med-low for 1 hours (until soft). take off the burner and set aside. They will get bigger as they cook.


Brown your meat and drain fat if needed.


Add the raw veggies (My carrots got old, so I didn't use them this time)


Cover and let them cook until the onions are soft.


Add the spices & seasoning. 


See how the beans have improved? All that thick liquid will add body and flavor to the chili.


Add the corn and tomato. If you feel like you need more, go ahead! This is your chili now.


I mixed in the beef and let everything heat up. I left it on for about an hour, but you don't *have* to leave it on for that long. I turned it to med-low and let it simmer.


I added the cilantro last. I chopped the stems and leaves of an entire bunch of cilantro. This is optional, but I think it adds a wonderful flavor.


We ate it with shredded cheddar and a dollop of sour cream on top.

Wednesday, July 20, 2011

Picadillo

I'm only half Cuban. I married into a Cuban family. My American mom, however, taught me how to make the best Picadillo. Maybe it's because she's the best cook I know! I don't make it exactly like she does, but the recipe is basically the same. If you don't know what Picadillo is, let me start by telling you that has nothing to do with Pikachu. (Pika pika pikadillo?) It's a general term in Spanish for ground beef. I've seen it with potatoes, with capers, annatto oil, but I have yet to make it with these ingredients. I would like to try different styles in the future, but can I just warn you that this one is really good? This recipe is a true success, if I may be so blunt. Maybe if you've never had Cuban food before, it will be a bit foreign, but I've met many a Miamian who are reluctant to move away because they will miss the food!
Here is how I made Picadillo yesterday:

1 lb ground beef
1 medium yellow onion, diced
2 tomatoes, diced
6 large cloves garlic, minced
1 green pepper, diced
1/3 cup raisins
1/3 cup green olives
1/3 cup slivered almonds
1/4 tsp cinnamon
1/4 tsp cloves
1/2 tsp cumin
1 1/2 tsp salt
dash of pepper (if desired)
1 tbsp cooking wine

1- Chop your onion, tomato, pepper, and peel the garlic while you defrost your meat (if it needs defrosting). Start some rice just before browning the meat, or make it ahead of time.
2- Brown beef with onion and garlic (crush into the pan or mince first), drain excess fat if needed.
3- Add tomato, pepper, salt, pepper, cumin, cloves, cinnamon, raisins, and cooking wine. Mix it all in, then simmer for 10-15 mins.
4- Toast the almonds for 2-3 mins over medium heat. I added a little butter. You really have to watch this or they'll burn! They still taste good burnt, though. I don't have a picture of this step because I saved some from the last time I made Picadillo.
5- Add the olives & almonds before serving. It is traditionally eaten over or along side white rice. It also goes well with traditional Cuban sides like yucca, black beans, Cuban bread, or plantains. You can also serve with a side salad, but that's not the Cuban way.


Here are my ingredients, sans the ground beef- I left that in a bowl of warm water (wrapped tightly in plastic) to defrost while I began to chop my ingredients. R2-D2 there is my pepper mill and the Beatles drum is a salt shaker. I only used half the green pepper. I can't wait to start cooking with homegrown veggies!


Not pretty to look at, I know, but I'm throwing this rubbish in the compost bin! There are nutrients here that plants crave (and electrolytes are not what plants crave).


Browning the beef with onion and crushed garlic. This smells heavenly in itself.


Look at all that good stuff! I added the tomato, pepper, salt, pepper, cumin, cloves, cinnamon, raisins, and cooking wine and let it simmer for a good long while- I had to wait for my husband, Jorge, to get home.


At this point your kitchen will be filled with a savory aroma. I mixed the olives and almonds just before serving.


This is definitely a favorite, and so easy. Jorge said he could eat two more bowls of it (but I stopped him so we can have leftovers).


I have to say that there is such a medley of flavors contributing to why this is just so good- the plump raisins that soak up the juices (especially the next day- they look like tiny grapes), the sweet cinnamon & cloves, the delicious crunch of almonds, the tart olives- this is one of my favorites, and it is so hard to do this wrong. It is very satisfying, too. You will want to make this again.