Sunday, July 31, 2011

Garden update


I've been busy this week with my Link cross stitch. I can't think about gardening all the time, it gets boring waiting for things to grow. I'm disappointed that my Cilantro and Chives still haven't shown the slightest sign of life. My Oregano sprouts have been doing well, but are are tiny as heck!


The photo below is one of my three parsley sprouts.


I love how the "true leaves" that first come out are like teeny, tiny versions of those trademark leaves we recognize from the grocery store. 


This (above) is one of my bell peppers.


I tried them on the sill, but I don't think they were getting enough light. I tried them outside next but I think it's been too hot (it hasn't rained in like three days). I guess summer in Miami isn't the best planting season, although I do have these nifty $1 pots from Ikea to haul them around in.


My tomatoes are growing very well, but I've had to patrol for whiteflies. Again, summer...


The leaves are aromatic.... I can't wait till I see them start to flower!

Tuesday, July 26, 2011

TV Watching Blanket

I call this my "TV watching blanket" because I made the entire thing while watching TV! I tend to do a lot of crafting while I'm doing other things. It's not uncommon to see me working on a cross-stitch or knitting while sitting and visiting with friends or family. It's a different kind of hobby- the multitasking craft, rather than the beautiful and challenging craft. You don't have to devote all your attention to keeping up with challenging steps or paying close attention to where you need to go next. It's more mechanical in nature, yet still handmade! This particular multitask project wasn't just fun to make, it's also practical- it's great for cuddling under, too. It's kind of ugly, though. I bought random colors of yarn years back because I liked them, but had no idea what in the world I was going to make of them. This is a habit of mine. I justify the purchase, thinking that I'll figure it out later. Well, I made three blankets way back when - yeah, like ten years ago (which is a long time ago if you're in your mid twenties) and gave them away to my closest friends.

Let me start by saying this blanket was not really planned out too well. I started out by using up some blue, then added the pretty green I picked out (my palate is very predictable) and decided that I was going to add some more texture than a simple garter stitch, which is knitting the same stitch every single row. Instead, I alternated stockinette and garter because that was the extent of my knowledge. It is very soft. I used Caron Simply Soft acrylic yarn (it would make true knitting fanatics cringe), but it was cheap yarn and super comfy. I used size 8 US circulars to accommodate the width.

I learned how to knit when I was so young (maybe 10 years old?) that it seemed like adding any new stitch patterns to my repertoire would be an insurmountable achievement. I'm sad to say that it took me until about six months ago to have enough confidence and curiosity to challenge myself to master the art of understanding patterns. And I found that it's not so hard (but still requires your brain!). So, hooray for learning, but also hooray for mindless crafts so we can socialize or watch movies and still be crafting with our hands. Gladly, I've added more stitches to my skill set, so I now have more mindless knitting that looks nicer, too. This is the blanket I finished about 2.5 years ago:


Featuring Agatha Christie's "A Body in the Library" and my phone. In the photo below (click to enlarge) you can see more of the texture pattern I made with alternating garter and stockinette stitches.


Only better things could come after this because I mastered many more stitch patterns! I even learned to do lace and knit in the round! If you're at all interested in finding me on Ravelry, my username is Craftstina, like the blog's name. Coming soon: more detailed mindless knitting projects!

Saturday, July 23, 2011

Cucumber Sandwiches & Salad

The Cucumber Sandwiches I made were the "Modern" type. Traditionally, cucumber sandwiches were a food for the wealthy- they could afford food for pleasure rather than for nutrition. Oscar Wilde's "The Importance of Being Earnest" featured the traditional version of this sandwich. Algernon eats all the cucumber sandwiches which were intended for his guest, Lady Bracknell- and then he tells here there were no cucumbers in the market, not even for "ready money".
I thought the "modern" version sounded more tasty than the ones with just butter. They were really good! These would make good snacks or party food. I didn't have garlic or onion powder, so I used one small clove of fresh garlic, and I threw in some minced onion. I like fresh better. If you want to do the same, I would say cut a couple of slices of a medium-sized onion and mince it into fine pieces. You see how thick this is? They do NOT have to be that thick. You can spread a thin layer on each sandwich. We piled it on because we were eating it as a meal (no protein, I know!)


The Cucumber Salad I made the same day, so I could use up the cucumber slices we didn't use for the sandwiches. This was really good, but the longer it marinates, the more bitter it gets! Keep that in mind- you can add less vinegar and more sugar if you like. I used the exact quantities that this recipe required. I followed the advice of a reviewer and salted the cucumbers before adding the marinade, and I added the dill to the vinegar, sugar, and water on the stove before boiling. It came out great! It tasted like fresh, crispy pickles. This would go great at a barbeque. It's light and tangy. I didn't use 4 cucumbers though, so keep in mind that my veggies were swimming in sauce. It's best the next day.


Thursday, July 21, 2011

Mango dessert sauce

Remember the Mango Crisp? We had loads of leftover mangoes, so I made some sauce for ice cream.
 This is so subtle and delectable. I'm not a big mango fan, but we used the sweetest, most ripe and perfectly textured mangoes that I suddenly became a fan. I'm a huge fan of this sauce. Suddenly I want all ice cream to be smooth vanilla with heaps of this creamy sauce on top. You could probably even put ice cream in the blender with it and make a mango shake with lime and rum! I mean, forget ever going out for dessert. This is goooood. It's so simple. If you love mangoes, you'll love this!

Cut your mangoes into chunks. The size doesn't matter because they are going into the blender. Read this article if you're unfamiliar with scoring a mango. I prefer to scoop them out with a spoon, but a blunt knife works. Plop them in the blender. If you're like me, you can save the juices or suck them off the skin and seed. So juicy. Add turbinado or sweetener of choice (It strangely is not overly sweet) and add the rum. Puree until chunks are gone. Refrigerate. That's it!
I put about 3-4 cups at a time into the blender. (5 mangoes gave me about 6 cups)
I added 1/4 cup turbinado (brown or white sugar if no turbinado on hand) and
1/4 cup rum (dark rum preferred).
I added the juice from 1/2 a lime for each batch. I think it was about 1 tbsp.


I made it before with turbinado, and I think it tasted better. Fresh, ripe (but not over-ripe, slightly firm) mangoes give the best flavor.


The rum gives a slight flavor, (but a good one!) so add more or less to your tastes. Omit if you desire.


This was the product of 5 mangoes. I stuck them in the freezer!


The texture is like runny jello. I would recommend serving it from the fridge, not at room temperature. Serve over ice cream, cheesecake, or dessert of choice. The internet tells me it will keep for months in the freezer. I've kept a batch for 2 weeks in the fridge, and it looks more translucent but tastes just as good. Don't take my word for it, though...

Wednesday, July 20, 2011

Picadillo

I'm only half Cuban. I married into a Cuban family. My American mom, however, taught me how to make the best Picadillo. Maybe it's because she's the best cook I know! I don't make it exactly like she does, but the recipe is basically the same. If you don't know what Picadillo is, let me start by telling you that has nothing to do with Pikachu. (Pika pika pikadillo?) It's a general term in Spanish for ground beef. I've seen it with potatoes, with capers, annatto oil, but I have yet to make it with these ingredients. I would like to try different styles in the future, but can I just warn you that this one is really good? This recipe is a true success, if I may be so blunt. Maybe if you've never had Cuban food before, it will be a bit foreign, but I've met many a Miamian who are reluctant to move away because they will miss the food!
Here is how I made Picadillo yesterday:

1 lb ground beef
1 medium yellow onion, diced
2 tomatoes, diced
6 large cloves garlic, minced
1 green pepper, diced
1/3 cup raisins
1/3 cup green olives
1/3 cup slivered almonds
1/4 tsp cinnamon
1/4 tsp cloves
1/2 tsp cumin
1 1/2 tsp salt
dash of pepper (if desired)
1 tbsp cooking wine

1- Chop your onion, tomato, pepper, and peel the garlic while you defrost your meat (if it needs defrosting). Start some rice just before browning the meat, or make it ahead of time.
2- Brown beef with onion and garlic (crush into the pan or mince first), drain excess fat if needed.
3- Add tomato, pepper, salt, pepper, cumin, cloves, cinnamon, raisins, and cooking wine. Mix it all in, then simmer for 10-15 mins.
4- Toast the almonds for 2-3 mins over medium heat. I added a little butter. You really have to watch this or they'll burn! They still taste good burnt, though. I don't have a picture of this step because I saved some from the last time I made Picadillo.
5- Add the olives & almonds before serving. It is traditionally eaten over or along side white rice. It also goes well with traditional Cuban sides like yucca, black beans, Cuban bread, or plantains. You can also serve with a side salad, but that's not the Cuban way.


Here are my ingredients, sans the ground beef- I left that in a bowl of warm water (wrapped tightly in plastic) to defrost while I began to chop my ingredients. R2-D2 there is my pepper mill and the Beatles drum is a salt shaker. I only used half the green pepper. I can't wait to start cooking with homegrown veggies!


Not pretty to look at, I know, but I'm throwing this rubbish in the compost bin! There are nutrients here that plants crave (and electrolytes are not what plants crave).


Browning the beef with onion and crushed garlic. This smells heavenly in itself.


Look at all that good stuff! I added the tomato, pepper, salt, pepper, cumin, cloves, cinnamon, raisins, and cooking wine and let it simmer for a good long while- I had to wait for my husband, Jorge, to get home.


At this point your kitchen will be filled with a savory aroma. I mixed the olives and almonds just before serving.


This is definitely a favorite, and so easy. Jorge said he could eat two more bowls of it (but I stopped him so we can have leftovers).


I have to say that there is such a medley of flavors contributing to why this is just so good- the plump raisins that soak up the juices (especially the next day- they look like tiny grapes), the sweet cinnamon & cloves, the delicious crunch of almonds, the tart olives- this is one of my favorites, and it is so hard to do this wrong. It is very satisfying, too. You will want to make this again.

Tuesday, July 19, 2011

Stuff I want to try!

I have a lot of blogs on my Google reader. I mean, I follow 34 blogs just in the craft/cooking/gardening sections. I get a lot of ideas. This post is going to be about things I actually want to try.

Knitting:
Necktie

Stitching:
When I read this blog, I want to cover our house in nerdy crafts.

Baking:
Tiny pies!
Button cupcakes

Cooking/recipes:
Portabello Pesto Pizza (how's that for alliteration?)
Chicken Shawarma- have to admit, I don't know what this is but it looks good! I love this blog!
Birthday Cake Pancakes! I love cake batter ice cream, so I gotta try this...
Skillet Lasagna, another awesome looking meal courtesy of Budget Bytes. I love the step-by-step photos!
Creme Brulee French Toast- Jorge's favorite dessert in breakfast form?
BLT Pasta Salad- I love experimenting with pasta salads, I get creative. I will certainly post some of my trademark recipes!

Other food:
Homeade fruit leather- a good use for mango? We'll see...
Sky in a glass- this looks awesome!
Sweet Sprouts - they look like seedlings!

Inspiration for home projects:
Chinese lantern = Hot Air Balloon. Ikea hackers is a treasure trove for DIY projects for the commoner. I've also wanted to create a Mud Room in our entryway. I think every house (with room) should have one.
I loved this unique way to store yarn- on display inside a wine rack.

This last link isn't something I would likely ever own, but in my ideal world, I would be able to ramble in the forest wearing a gorgeous Dream Coat. They are a bit pricey to begin with, but I live in Miami, FL. Chances are it will never be cold enough to warrant one.

Monday, July 18, 2011

Learning how to grow

I haven't posted a legitimate post in over a week. I've been far from inactive in my hobbies, though! I've experimented with the slow-cooker, picked up an old cross-stitch project, but most of all, I've been tending to my new sprouts! On a whim, I planted bell pepper, parsley, cilantro, chive, and oregano seeds. I also started a "Sensitive Plant". This one is particularly fascinating because when you touch it, it closes up. It also closes up for the night. Here's a gif of the action, courtesy of Wikipedia:

This is what mine looks like, next to the Parsley:

I am going to move it outside to spot with filtered sunlight (more hours, not direct sunlight). The stem is getting so long, it makes me think it's seeking sunlight. The Sensitive Plant, Bell Pepper, Parsley, and a tiny, tiny Oregano (just sprouted today!) are the only ones that have sprouted. I'm still waiting on the Cilantro, Chives, and the *other* parsley.  

I've been researching what sorts grow here in South Florida. I broke the first rule about planting in SoFla, I planted in the middle of summer. I'm supposed to wait until late Aug/Sept. to plant, preferably October. It's more challenging to take care of these plants during this season. The weather at the moment is a bit baffling. It's either overcast and raining monsoons all day, or it is scorching hot. Remember my tiny tomatoes from this post? I've kept my tomatoes unsheltered in the rain and sun all day and they seem to be thriving. I mean, from day 1 they were out there. This is what they looked like on July 9th:

And then one week later, July 16th:


They are definitely getting bigger! The heat doesn't seem to be killing them...

My pepper sprouts, however did not respond too well. They were outside in the same spot the tomatoes were in when I neglected them and left them for dead.The peppers dried up and fell over. This broke my heart. I really want to grow peppers! I nursed them back to health with plenty of fresh water and kept them in the windowsill where they seem to be doing better. I thought peppers were heat lovers! I thought that if it would be too hot for the peppers, surely the tomatoes would have the same problem, right? Maybe they are still to young and tender. I'm still learning! This is what my peppers looked like as of July 9th:


One week later, July 16th:


We are working on building an in-ground home for more plants to come this fall. We had to remove all these rocks and we think we found someone who wants them. My hard-working husband has been helping me with this on his vacation! Here is a sneak peek of our future vegetable patch:


The soil here is a disaster, and I'm paranoid about nematodes and other pests that could be part of the soil- since I can't vouch for the quality, we're planning a sort of raised bed. It won't be that raised because the concrete and deck around it is raised, too. I can't wait to see what it may turn out to look like. 

Needless to say, I am becoming increasingly fascinated with all kinds of Flora, and am doing loads of research. I'm learning something new every day, but I've already begun these sprouts without knowing what I've gotten myself into. I see pictures of gardens that look so lovely, but they've got to be a lot of work! Doesn't the idea of having a scented flower bush, a plant that repels mosquitoes, or one that can be used as a natural sweetener sound appealing? If you've ever enjoyed the flavor of vegetables, fruits, and herbs, then producing some at home must have some appeal.

I read this yesterday, and I'm enchanted by the pictures used from Edible Landscaping. As far as the article itself goes, I'm with the Geek Mom here- I think fruit-bearing plants are just as appropriate landscaping as any other type of tree/shrub/bush/plant. I agree that it is ludicrous to call a front-yard garden "unsuitable". If I had one of those around my neighborhood, I'd spend all my time watching things grow! It would be more of a pest for the owner of the garden, not for the onlookers! I would be afraid of random strangers getting to it when we're not home. Anyway, wouldn't you be impressed to see a tiny olive tree with little green and black olives decorating a front walkway? What if you saw a tiny blueberry bush covered in plump berries sitting outside a front door? I would be impressed. I feel like I've been awakened to the simple beauties around me, and I suddenly get excited about the progress my plants are making every day. My eyes are opened to the world around me. It's so easy to take it all for granted!

Yesterday, I went to Lincoln Road, Miami Beach with my family. I looked around with an increased awareness of the vegetation, and saw this little beauty in the middle of the city:


It's like a tiny magical woodland in the middle of Miami Beach. There are vines on the ground instead of grass. I love how plants can make people feel at home wherever they are. I would take a beautiful landscape over an angular sculpture any day. I'm sure you haven't heard the end of this, especially since I've just tapped into this latest obsession- but worry not, it's far from a passing interest. I esteem my hobbies as volumes learned and stored on the shelf for later use. I may have learned to quilt  almost a decade ago, but I now have the skill to do it again! I love the idea of adding to my collection of interests, as much as I adore renewed interest in old pastimes.

What I've learned this week:
Gardening is an acquired skill, just like most other hobbies. You can get better at it by learning more about it. Don't be intimidated because plants can die easily with improper care- just research, and learn from experience.
Fertilizer contains Nitrogen (for leaf growth) Phosphorus (for blooms) and Potassium (for root growth). Tomatoes and other vegetables will not fruit if they are fed too much Nitrogen!
Cilantro and Culantro are two different herbs! Cilantro is often known by the name of its seed, Coriander.
Chipotle peppers are not a special variety, they are just red, smoke-dried Jalapenos!
Over watering can be bad for your plants- it washes out nutrients from the soil, and can lead to root rot. You'd think that because the roots are underground that oxygen would be "too mainstream" for them, but they need oxygen! The key is soil- it should retain water so the roots can suck it up as needed, but not drown them.

Tuesday, July 12, 2011

Crafty Accessory

Did you know there was a market for this? I didn't! I suddenly want an iphone.

Friday, July 8, 2011

Wallace & Gromit - closing chapter on ceramics

Since my last three posts were fresh material, I'm going to revisit my final ceramics project. At times I look at its flaws and think I would do so much better now, but we will never know. The closest thing I will ever get to ceramics after this point (January 2001) is modeling with polymer clay- something I will probably experiment with again sometime.

Before I get to the pictures, let me make this disclaimer- I was rushed into entering this into the "Youth Fair" that didn't think this was worth an honorable mention. I regret that because I was left with the loose characters and needed it to be one piece, forcing me to seek an alternative from my original design. I wanted to design their living room with tacky wallpaper, side table with cheese and tea, pictures on the wall, a rug on the floor, a lampshade, and all- something like this (not exactly):


The decision I was left with at the tender age of 16 was that I was to either enter the fair with a molded platform resembling a squashed barrel, or to not enter the fair and have a work of art. I chose the former, thinking I would inevitably make another, more superior version. I didn't. This is what I entered:


See the awful barrel thing? Ugh, I don't know what it's even supposed to be. At any rate, this old thing is riddled with errors, and I think ceramic clay is not the best for making cartoony clay characters like these- Wallace's sweater looks droopy, and his head kept tilting back (it was a balancing act trying to pose him with the soft clay) The end result looks like they are looking in two different directions. I assembled them in pieces (that's the key to making the whole thing look like what you want- there has to be a structure. For example, make the shape of the head, add the mouth, ears, nose; dimple the brow, add the eyes, etc.) Here are some pictures of the back:


Wallace's fingers fell off at some point and I had to struggle to get them to stay. All in all, for a project I finished 10 years ago- I was always quite proud of this, as I am with my quilt. There's a couple of other things that I enjoyed the end result of, so stay tuned for more of that. With the backside of W&G, I close the chapter on ceramics in this blog. It's like they're waving goodbye.

Wednesday, July 6, 2011

Garden on the brain

Three weeks ago I cut open a tomato and the seeds were sprouting inside. So of course, I planted them outside. They appeared to die as they were growing mold, but lo & behold! They live on! Then on Sunday, I found out that a certain succulent called Echeveria Amoena survived a trip from St. Augustine. I put them down and forgot about them and they grew! Ever since, I thought "I'm a farmer!" With this face:

Here are what I have so far of the tomatoes:


We have a plot that would be perfect for a garden but is now some sort of southwest style desert themed garden. There are tons of rocks and there was a cluster of aloe, which is a succulent plant with medicinal characteristics- the juice inside the leaves are a sort of burn salve!


I didn't realize that aloe reproduce the way they do. What I thought was maybe 5 was more like 40. I wanted to put the aloe plants in a pot, but when I started pulling them out of the ground, I felt like the midwife to Perdita in 101 Dalmatians. The end result looked like I was pulling bodies out of a burning building...


I read that this is okay for them, because the roots will grow callous and resistant to disease. I'm trying to give as many as I can away and I will try to find a place to plant some here... but I have a feeling they all won't survive. Knowing how they apparently reproduce, I can't imagine they are in short supply anywhere. I wonder how long that cluster was there... we only moved in March of this year!


Meanwhile, I've got 11 books on hold that I have to pick up from the library on gardening and the like. More on composting, succulents, herbs, and seedlings later.

Tuesday, July 5, 2011

Mango Crisp

Saturday was my father-in-law's birthday, so we went over Sunday for lunch.  I made mango crisp for the family because his dad tends to like my baked goods. As we established in my last post, I'm probably better at baking than frying. I've looked at many different Crisp and Cobbler recipes, and they seem very flexible. This is the original recipe I came up with based on research for both- I wanted to make something delectable in my foolishness.Yes, I haven't learned yet not to experiment with something I've never made before. It's worked for me in the past, so I'm trying it again. After all, this wouldn't really be an enterprise if I wasn't challenging, right? Well, I gave this guinea pig a try Sunday, so Monday's is slightly different. Here's today's recipe:

Mango Crisp

Filling:
6 - 8 cups  diced mango or 4 - 5 ripe mangoes (or whatever is on hand to fill the pan)
1/4 cup rum (to 1/2 cup for more flavor)
2 tbsp lime juice (approx 1 lime)
1 cup sugar
1tbsp cornstarch
1/2 cup water
2 tsp cinnamon
Crisp Topping:
1 1/2 sticks (12 tablespoons) butter, melted
1 cup all purpose flour
1 1/4 cup rolled oats
1 cup brown sugar, packed
1tsp cinnamon
Pinch of salt

Topping:
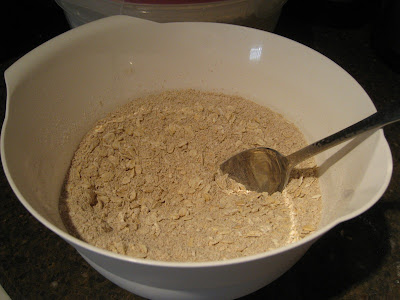
Mix dry topping ingredients in a bowl.  Stir in butter, set aside.

Filling:
Cook the water, white sugar, cornstarch, mangoes, lime juice, and cinnamon for about 20 mins. on low (after you bring to a boil). ** Note: if you want less liquid, add less liquid or more cornstarch**
This will create a more jelly like texture and reduce the water a little (It thickens after cooling from the oven). Mix in the rum, then pour into a greased 9" x 13"baking dish.
Twist a fork into the topping to fluff it up, and sprinkle the crumbs onto the fruit. The liquid from the fruit will have a thick but watery consistency, so large crumbs will sink in. Sprinkle entire mixture over the top. Put tinfoil under pan to catch drippings, bake it for 35-40 mins. on 375°  or until topping is golden brown and filling is hot and bubbly. Serve with whipped cream or ice cream.


We seriously had more than 25 mangoes at home. Jorge's grandfather has 3 trees bearing fruit right now. (Not all are pictured here)


I diced them, but you can slice them. I cut the two sides off center (the pit is in the center) and then scored them into squares, then I removed the flesh with a spoon from the skin. Then you'll want to get more flesh from around the pit.


 Jorge measured the dry topping ingredients here, and mixed them well before adding the melted butter.


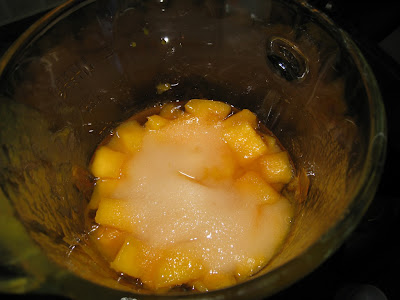
I piled up the lime juice, sugar, cornstarch and cinnamon on the mangoes, heating it just above medium until it boiled, then turning it to low for 20 minutes. I added the rum afterward, but you can do it however you like.


The topping next to the filling. The topping gets compact, so you'll want to fluff it up with a fork so you can sprinkle it on top and keep it aloft.


I did a quick spray with PAM but I suspect it's not necessary.


Ready to go into the oven.


Fresh out of the oven. See how the topping sinks in? You can omit the water, but I think it gives a nice sauce that mixes well with vanilla ice cream!


More sunken topping. It didn't affect the flavor, don't worry.

I used 5 ripe mangoes and it yielded about 7 cups. I would also like to try this with coconut milk instead of water, and shredded coconut and macadamias mixed in the topping. I suppose you could also use bananas and other tropical fruits... I think a tsp of vanilla would have added some charm, but then it's getting more like apple crisp than a tropical flair. Experiment as you please!