Saturday, March 17, 2018

Instant Pot Cuban Style: Lechon, Moros, y Yuca

Juicy meat (not broiled), rice and beans, and yuca bursting with garlic and citrus flavor.


A couple months ago my father in law brought over a massive pork shoulder that he had been given. Despite being Cuban, they had never cooked one before and left that to me to figure out. It was a 10 lb hunk of meat, bone and all, and seemed a little intimidating. One day I took it out to thaw and figured it couldn't be avoided forever.

I had done a little research trying to figure out what cut of meat it was, and what it was supposed to be used for. I read that a pork shoulder is best cooked over a long period of time on low heat, but it wouldn't even fit in my slow cooker. But then a light bulb went off as I came across this site. I have an Instant Pot!

First of all, that source is not really authentic, but it does pretty much follow the same guidelines as most recipes I looked at. Except, you really don't need any additional fat at all whatsoever, because pork shoulder is very fatty. More on that later.

I am not going to go into the history of each dish or how they got their names. I'm going to provide links to sites I used for instructions and describe what I did and what worked for me.


Lechon Asado: Cuban Roast Pork

I marinaded my 10 lb pork shoulder overnight in:

-1 cup sour orange juice (mine was 1/2 regular orange juice and 1/2 lime juice, because we had it on hand)
-1 head of garlic
-2 tsp salt
-1 tsp pepper
-1 heaping tsp oregano

The Three Guys From Miami recipe says to add 20 cloves of garlic, which makes me think it would have been more to my liking, but it was still very tasty. 

The following day, when I was ready to cook the pork, I placed it in my 8 quart Instant Pot and set it to:

-Manual, High pressure, 150 mins (2.5 hours), natural release

Based on the Instant Pot instructions I found earlier. She suggested 120 mins for an 8 lb roast, so I added another half hour for the 10 lb roast. Otherwise it would have taken 8-10 hours on the slow cook setting. In retrospect, while the outer layers were falling off the bone, the inner parts could have used more time. 

Most of the fat removed, in the process of removing the meat from the bone.


So, I generally don't like working with meat on the bone, or with fat- but it adds flavor. It was a mess but worth the hassle. When it was done depressurizing, I put the roast on a cutting board and removed chunks of fat while I took the meat off the bone. 

Pulled off the bone out of the Instant Pot.


Afterwards, I skimmed as much liquid fat as I could out of the remaining liquid in the pot and then put the shredded meat with the liquid into my 4 quart crock pot (which it filled to the very top!) I left it to simmer while I used the Instant pot for the next part of dinner: rice and beans. Before we move onto that, I have to add that while we ate the soft, shredded pork straight from the crock pot that first night, I reheated the leftovers by broiling the meat for about 15 mins on high, flipping it mid way through. I liked it much better this way. The only things I think were missing from the pork were onions (both recipes contained them but I failed to add it) and fresh squeezed lime on top. 

Moros y Cristianos: Black Beans and Rice

I have never made this before, either- it's a version of black beans and rice that uses the black water from the beans to cook the rice, giving it a dark color. I have made black beans many times before and I have to say I need to perfect this method because it was a little bland for my tastes. I followed this recipe, even though it says "Congri" which I believed to be red beans and rice- but there is a bit of controversy and confusion over the name "Moros" but I'm just sticking to what I know here.

I put the following in the Instant Pot, and turned it to the "Beans/chili" setting. 
-1 lb of dry black beans
-6 cups of water
-1 Tbsp of bacon fat

I let it do its thing and depressurized after 10 mins of natural release. Next, I drained the beans in a colander over a bowl to save the liquid. Then, on the saute setting, I cooked just until softened:
-1 large onion
-4-5 cloves garlic
-1 large green bell pepper

Then added the remaining ingredients, mixing them together and cooked it on the Rice setting, again releasing pressure after about 10 mins after the cooking was completed. There was just enough liquid to cook the rice and everything turned out well.
-1/2 tsp cumin
-1/2 tsp oregano
- 1/4 tsp of bay leaf powder
-2-3 cups of long grain rice (I used 3) + equal amount of liquid reserved from beans
-drained beans

I feel it lacked something, then I remembered I failed to add salt and pepper. I've also seen recipes add vinegar, tomato paste, or red bell peppers, too. I usually add Sazon Goya to my black beans, I think I'll try that next time.

Yuca con Ajo

Finally, I made some Yuca (from frozen bought) and made it exactly as this recipe suggested from the Three Cuban Guys site, which is NOT done in an Instant pot. It's the easiest recipe out of all of these, though. It is boiling yuca for about 30 minutes and cooking garlic and onion in olive oil (with salt and lemon, of course). It was so delicious. For some reason, this always comes out a thousand times better than any yuca I've ever had in a restaurant. Maybe because I love the strong flavors of garlic, salt, and citrus together. It's pretty perfect. The only things I changed were that I crushed the garlic in a press and mashed it with the salt in a bowl, and that I like cutting the onion in slices so that there are rings of it when it's cooked, instead of dicing it up. The same thing goes for the pork.

There you have it. It's a lot of work (initially) but it's doable when you don't have a Cuban restaurant handy nearby, and if you're like me you can make a HUGEMONGOUS amount of food and feast all week long. Or invite your friends and family, like we did that first night. Or freeze some for later.  

Lechon reheated under the broiler in the oven- slightly crispy.

Not pictured: about the fourth meal into this pork, we bought some frozen maduros (sweet plantains) from the supermarket and baked them in the oven. It caramelized them and made them slightly crisp on the outside. Yum!


Saturday, January 21, 2017

"Create Your Own Tumbler" Travel Mug Sweater


I don't recall where I first saw this idea, maybe a friend had favorited someone's project. But I just loved this when I saw it and had to try it myself. The first project I saw was from Ravelry user jpknitknot, but I based my project from the notes that Ravelry user swellknitter took. I changed the decreases at the bottom.

Anyway, here is a rough guide to how I made mine. I used Opal sock yarn, which is 465 yards in a 100g ball. I used my 40" circulars in 2.25mm using magic loop. I saw that others had used their 8" or 9" circulars, but I felt it was too fiddly for me at this circumference, and used magic loop instead. I got about 8 stitches per inch, and knit until my cozy had reached about 6.25" before starting the decreases. You can block it to fit if it's a little small. Mine felt snug, but was very fitted, not loose.

Roughly, the pattern is to make your first decrease about 2" after the ribbing, and then again every 1.5" (twice) for a total of 6 decreased stitches. Once you knit the length of the mug, start the bottom decreases. If you want to try using a different yarn, try to knit a circumference of about 7.5" so that you have some negative ease (the mug is about 8.5" at the top).

Materials:
Fingering weight yarn (about 65-80 yards)
Size 2.25mm circulars or DPNS (or whatever is needed to meet gauge)
I bought the mug here at the Starbucks Store. It had better reviews than other brands.


CO 60 sts using long-tail cast on. Knit in the round (using magic loop with long circulars).

It curls a little when it's off the mug, but if you choose not to use ribbing, the outer plastic sleeve will hold it up. Use the look you want!

Rows 1-4: 1x1 ribbing (knit1, purl 1 across) - or just start in stockinette.
Rows 5-29: knit
Row 30: [K2tog, K28]* twice. (58 sts)
Row 31-47: knit.
Row 48: [K2tog, k27]* twice. (56 sts)
Row 49- 64: knit
Row 65: [K2tog, k26]* twice (54 sts).
Continue knitting until your cozy reaches the bottom curve of the stainless steel interior of the mug, about 6.25". For me, it was until row 77. Decreases for me started at row 78.

Decreases (6 decreases every other row):
1: K7, k2tog around (48 sts)
2: Knit
3: K6, k2tog around (42 sts)
4: Knit
5: Knit 5, k2tog around (36 sts)
6: Knit
7: Knit 4, k2tog around (30 sts)
8: Knit
9: Kknit 3, k2tog around (24 sts)
10: Knit
11: Knit 2, k2tog around (18 sts)
12: Knit
13: Knit 1, k2tog around (12 sts)
Cut yarn, draw through remaining sts.

Tip: Try on the cozy as you go. If you are getting close to the center and you haven't decreased to the end, you can skip a plain knit row (12) to decrease faster. If you find that you need more rows to meet in the middle, knit row 14 around, then row 15 K2tog around.

Also, if you are using a different brand or style of mug, here are some basic guidelines:
- If it is a straight cylinder and does not gradually get smaller at the bottom, do not do decreases until the bottom portion.
-Measure the top of your mug- as a rule, you want to make your sleeve slightly smaller than your mug so it hugs it, just like when you're making socks. So for mine, it starts off as 8.5", so I started mine at 60 sts which is 7.5".
-When you start your bottom decreases, if you use a different stitch count than the pattern suggests, just make sure it divides by 6, or find the closest stitch count to divide by. For example, if you are using a thicker yarn and cast on fewer stitches and end up with 50 instead of 54 sts, just decrease 5 times (k8, k2tog). Or if you have  56 sts, decrease 7 times (K6, k2tog).

-Another thing to consider: When you put a hot beverage in your mug it will loosen the fibers of your yarn, so you don't want it to be loose fitting when you make it. Also, it may not be a good idea to use acrylic because of the heat factor.


Wednesday, April 22, 2015

Fitbit One Wristband - crochet version

Materials:
Size 4.0mm hook, or appropriate size depending on how loose your tension is
Small amount of worsted yarn (leftover scraps will do)
Yarn needle

Row 1: Chain 5, HDC  in second chain from the hook, only in the back loops. Complete 3 more HDC for a total of 4. Turn chain, and HDC 4 in the front loops. (This image is helpful)
Rows 2-10: Work in the round, 8 HDC stitches per round (do not join for each round).
At the end of row 10, sl into next two stitches (I found that the start of the round migrates and this was to make the seam of the pocket align with the edge of the band).  The pocket should measure about 2" and be longer than the Fitbit once inside. Try it out before continuing.
Begin Band:
Row 1: Ch 2, DC in same stitch, DC in next 3 stitches.  (2 chain stitches +4 DC)
Row 2: Ch2, turn, DC 4.
Repeat row 2 until the band is a snug fit on your wrist, the DC will stretch. For me, 11 rows of DC was perfect.
When you're done, leave a long tail for sewing, and sew the end of the band to the closed end of the pocket. The FitBit should fit snugly inside, so if you feel like it's too loose, go down a hook size. If it's too tight, go up a size. It should be snug, but not difficult to slip in, and I made it so that the pocket is longer than the Fitbit so that it won't slide out easily. I also find that you can wear the wristband with the opening on the inside, toward your wrist, but it's not absolutely necessary.

The Ravelry page featuring this pattern can be found here: http://www.ravelry.com/patterns/library/fitbit-one-or-pocket-wristband-2

Tuesday, April 21, 2015

Etsy!

I am now selling on Etsy! It's taken me months made up of countless hours spent working on 100+ projects, but I have managed to list over 40 items. I am the smallest of small businesses, so any support is much appreciated, whether you view, favorite, share, give me some constructive feedback, or even buy.

Monday, February 9, 2015

Picadillo the Sequel

I've been making this for years, and have been eating it years before that when my mom would make it. Either I'm getting older and my tastes are changing, or this new way is really kind of awesome. Rather than a meat mixture over starchy rice, I've begun adding lentils to sort of "extend" the beef and add more nutrients. Other than the texture feeling less meaty, the taste largely remained the same. Then, I got this sprouted bean trio and used that instead of lentils. Actually, I replaced about half the beef with beans this time. To compensate, I increased the spices. We really love our spices in savory foods here. I also got some farro from my mom, and have never cooked with it before. Well, I'm sold. This is going to be the way we do picadillo from now on. Thanks mom for the grains, and sorry mom that we don't like picadillo the old way anymore.


The original post is here.

Picadillo mixture:
3 large beefsteak tomatoes, diced
1 large green bell pepper, diced
1 large onion, diced
small head of garlic, minced
1.5 lb of beef
1 cup green olives
3/4 cup raisins
1/2 cup toasted slivered almonds
1 tsp cinnamon
1 tsp cloves
2 tsp cumin
salt to taste (we had around 3-4 tsp, I think)

Grains & Beans:
2 cups of sprouted bean trio
2 cups of farro
about 12 cups water

1- Brown beef in a wide, deep pan on medium heat. Meanwhile, chop onion, tomato, and pepper, and peel garlic.

2-Drain fat off beef. Add onion and garlic to beef, and cook until onion starts to soften.

3- Add tomato, peppers, spices/seasoning, olives, and raisins, lower temperature and cover.

4- Add water to larger pot with farro and bean mixture. Bring to a boil, then turn the heat to med-low and cover. After about 15 mins, check to see that the beans have softened and the farro is "al dente". Cook longer as needed.

5- Toast the almonds in a small saucepan in butter over low heat. Be careful, it can burn if you leave it unattended!

6- When the beans/farro is done, drain excess water. Add picadillo mixture from the first pan into the larger pot. Mix it all together and top with almonds. You won't regret it!


Personally, I like it after it simmers a bit to allow all the flavors to mix, and the olives and raisins absorb some of the juices.

Wednesday, January 21, 2015

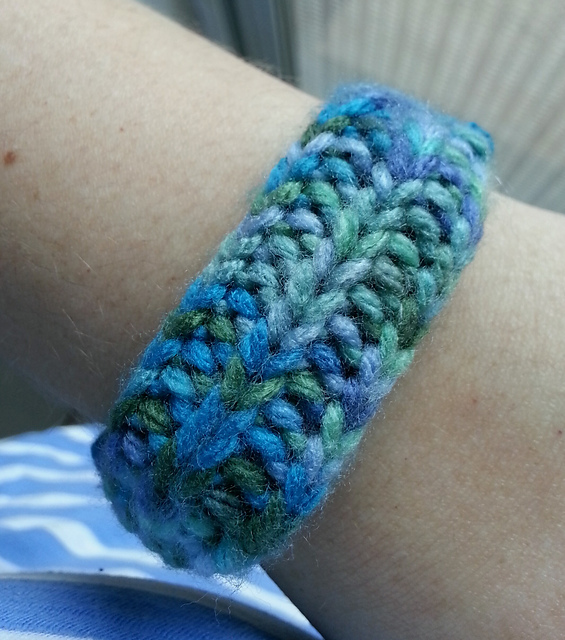
Fitbit One Wristband

It's been a long, LONG time since I've posted anything here. I just wanted to share the sleep tracking wristband I created for mine and my husband's new Fitbit One, as we find it more comfortable than the one it comes with.


Materials:
4.0 (size 6) double pointed knitting needles (or go down a size if you tend to knit more loosely. I am a tight knitter!)
Small amount of Worsted yarn (I used leftover scraps)
Yarn needle

Long tail CO 10 sts.
K1P1 rib in the round until the pocket measures a little longer than the Fitbit (without the case). Mine was about 2 inches.

Then, divide the stitches evenly on 2 needles and knit the 2 rows as one to close the pocket, which is known as a 3 needle bind off.

Knit the band (5 sts) in garter stitch until it is the right length for the wristband, keeping in mind that it will stretch out a bit once you try it on. I stretched mine out a little first so it fit a little more snug.

BO and use the tail of the yarn to sew the BO edge to one side of the pocket opening. The band can be worn with the opening on the inside to prevent the Fitbit from falling out, but it isn't necessary. It stays in pretty well as long as the pocket fits snugly over the Fitbit.

The Ravelry pattern page featuring this pattern can be found here: http://www.ravelry.com/patterns/library/fitbit-one-or-pocket-wristband

Friday, July 12, 2013

Looking to buy new needles, part 2

I heard back from Knitter's Pride customer service. Basically, the set sold on Amazon that was on par with the Harmony needles price-wise is not considered to be from an "authorized dealer"and therefore I'd be out of luck if a needle broke. My alternative is to buy it from an "authorized dealer" and pay $20 more for a set. I was a little confused because I saw a couple of Amazon reviews that mentioned they got replacement parts. I want to get something that will last,  but also something affordable,  so I am trying to make sure I'd be covered. I don't want to rush out and buy anything just yet, but I am excited to start knitting with a new set of needles! Pretty, shiny needles that will improve my knitting experience from now on.